Cloning/Overwriting
Cloning or Overwriting your containers allows you to create testing environments, push changes live or migrate containers between servers. These features are easy to use, but there's a few things to understand before jumping in.
First, it's important to understand that we always take an exact copy of your files and databases, we never create, edit or remove files or update information in your database. So if you have hard coded passwords or website URL's in a config file or database they will need to be updated by you. We strongly recommend using Environment Variables to make switching environments automatic as well as a way of improving security by not storing secrets directly in files or code repositories.
Second, you need to decide whether a Clone or Overwrite is the best fit for what you're drying to do.
In some rare cases, files, such as
.sockfiles, may not be copied over due to limitations in the cloning process. If you require these files, you will need to manually copy them over from another container or container backup after the cloning process is complete.
Cloning
When cloning a container, an exact copy of your container's application, config and crontabs folders are made and are all copied to a new container. Optionally, you may also clone databases, copying the contents into a new database. You can also create new users with privileges copied from existing users for the newly cloned databases.
Cloning a container can be very useful when:
- Setting up a Staging Environment: Whenever you need to apply major changes such as upgrading the version of PHP, adding new plugins to a WordPress site or even making small config changes, having a clone to apply the changes avoids disrupting any service the live container provides. This ensures that when it's time to apply these changes to the live container, no unpleasant surprises pop up.
- Migrating: If you have multiple Cloud Container Servers and want to move containers around, you can easily do so by cloning the container into another Cloud Container Server.
Overwriting
When overwriting a container, a copy is made for any of application, config, crontabs or all folders and is used to replace the matching folder on an existing container. Optionally, you can overwrite an existing database (linked to the container to be overwritten), with content from another database.
Overwriting a container can be very useful when:
- Applying changes from Staging to Production: Once the changes have been applied and tested, you can apply the changes by overwriting the live container with changes you have made on the Staging container.
- Synchronising Data: You can use the overwrite functionality to synchronise files from one container to another. This can also be used to synchronise content from one database to another.
- Synchronising Options: You can use the overwrite functionality to also synchronise options from one container to another, such as ports or the volumes used.
The data and options that you can synchronise are explained below.
Directories
There are four different directories that you can overwrite.
- application: This folder contains the website, or application, of your container.
- config: This folder contains all of your config files. By default, we always sync your config.
- crontab: This folder contains all of the different cronjobs.
- system: This folder contains the system settings, such as any socket files or other system-related files.
Options
We have different options which will allow you to modify the final overwrite as you want.
- Environment Variables: This lets you sync over all environment variables for the container.
- Volumes: This will keep the volumes the same between the two containers, allowing you to ensure that . Note that any mounted volumes will not be cloned over when overwriting a container on another server.
- Ports: This will keep the ports the same across both containers.
- Image: This will let you decide if you want to sync the image over as well. By default, we will always sync the image over.
Before You Start
Before you start cloning or overwriting containers, it is important to know the following:
- A part of your server's disk space is temporarily used to make a copy of the container it is important that you have enough disk space for a copy to be made.
- We never update or edit files or databases, so you may need to make some configuration changes after cloning or overwriting.
- When cloning a Production container and its database, any new data added to the database or the containers files will not be included in the destination. If you would like to avoid this, you can first stop the container to ensure that the cloned container and the original container are in the exact same state.
- When overwriting, the destination container is stopped to safely copy the files across.
- Before files are overwritten in the destination container, a backup of the container is taken.
- If an overwritten container needs to be rolled back, the latest backup can be used to rollback to in the backups folder.
- If the container you are cloning has cron jobs for example that automatically send email, you can clone the container to a shutdown state. This enables you to make the necessary changes to avoid duplicate crons running. Other examples include:
- Changing database credentials (WordPress, Joomla, Craft sites)
- Disabling certain services such as billing to avoid duplication.
We recommend that the container is shutdown when being cloned if the database and the user credentials it uses are also on the destination server. This will enable you to modify the database connection details, avoiding an example scenario where the cloned container uses the production database.
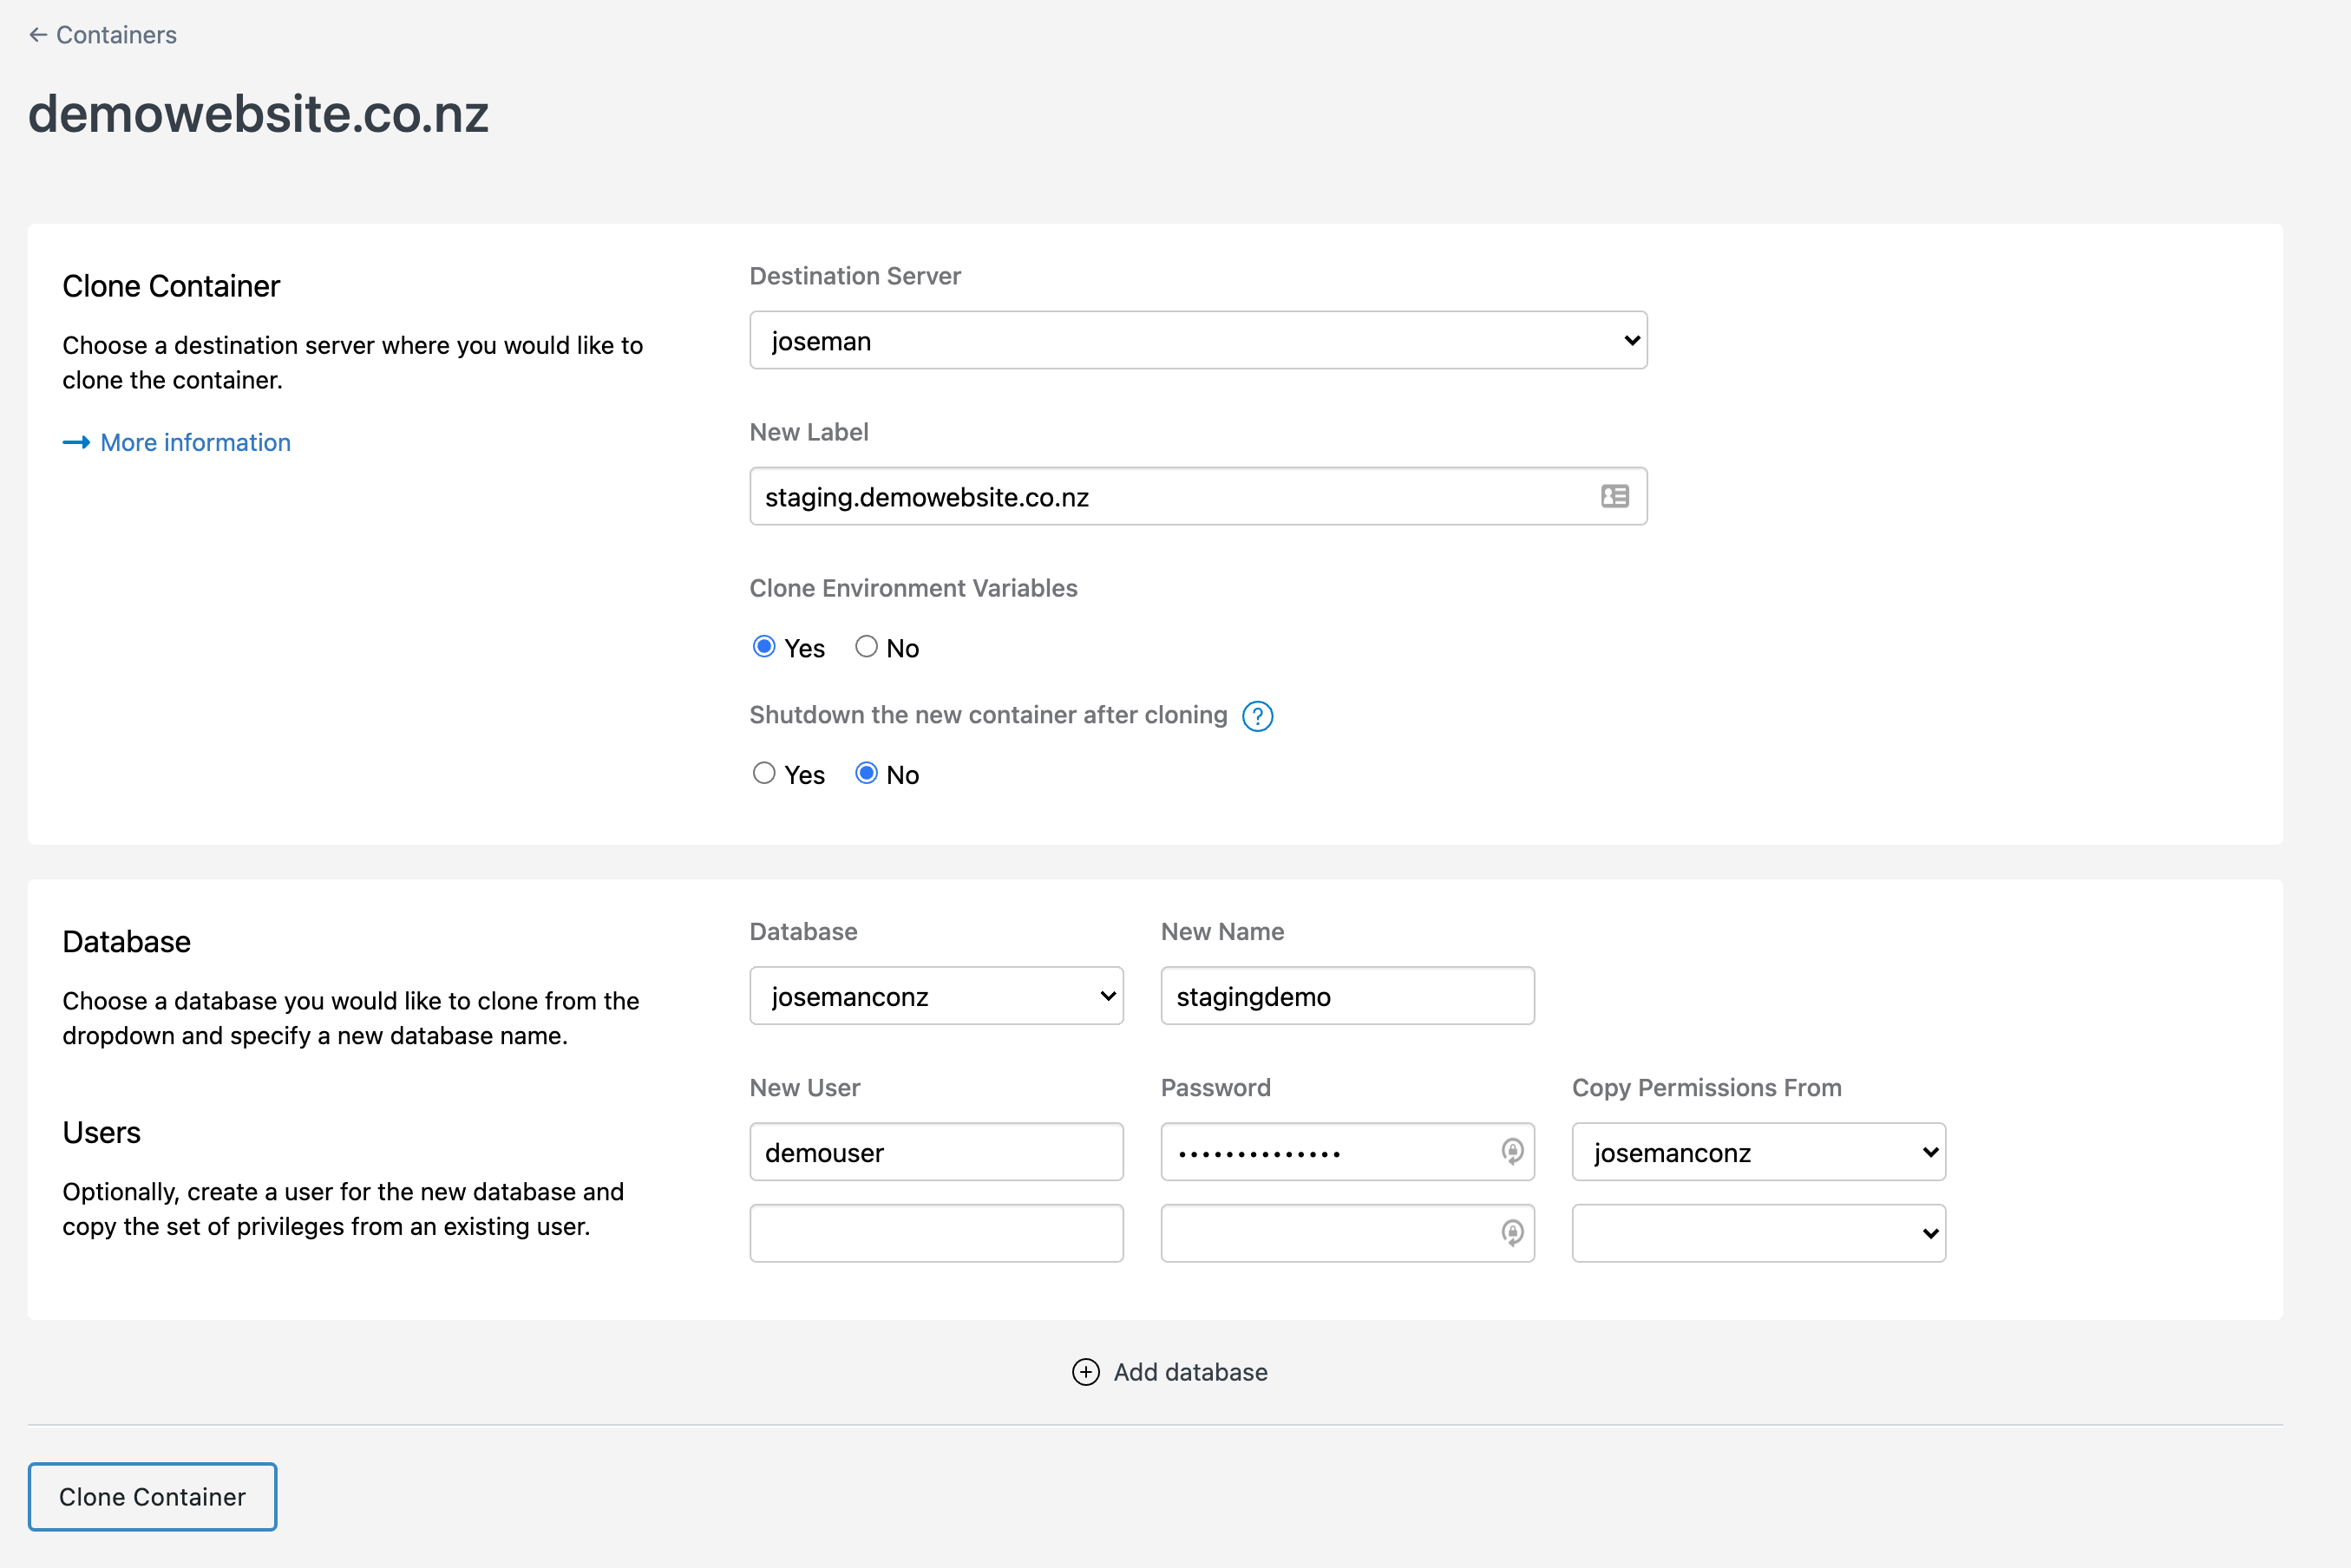
Cloning a Container
To begin cloning a container, follow the steps below:
- When logged in to the SiteHost Control Panel, click the Containers module from the menu on the left.
- Click the Container Label you would like to clone.
- On the top right, click Clone.
- A pop up will show, click Clone to a new container.
- Choose the destination server you would like to clone the container on to.
- Provide a new label for the new container.
- Specify whether or not you would like the container to be shutdown after cloning.
- To clone a database and user permissions: (Optional)
- Choose a database you would like to clone from the dropdown.
- Provide a new database name.
- Fill in the Username and Password with the desired details. (Optional)
- Choose a user to clone permissions from in the dropdown. (Optional)
- Click Clone Container.
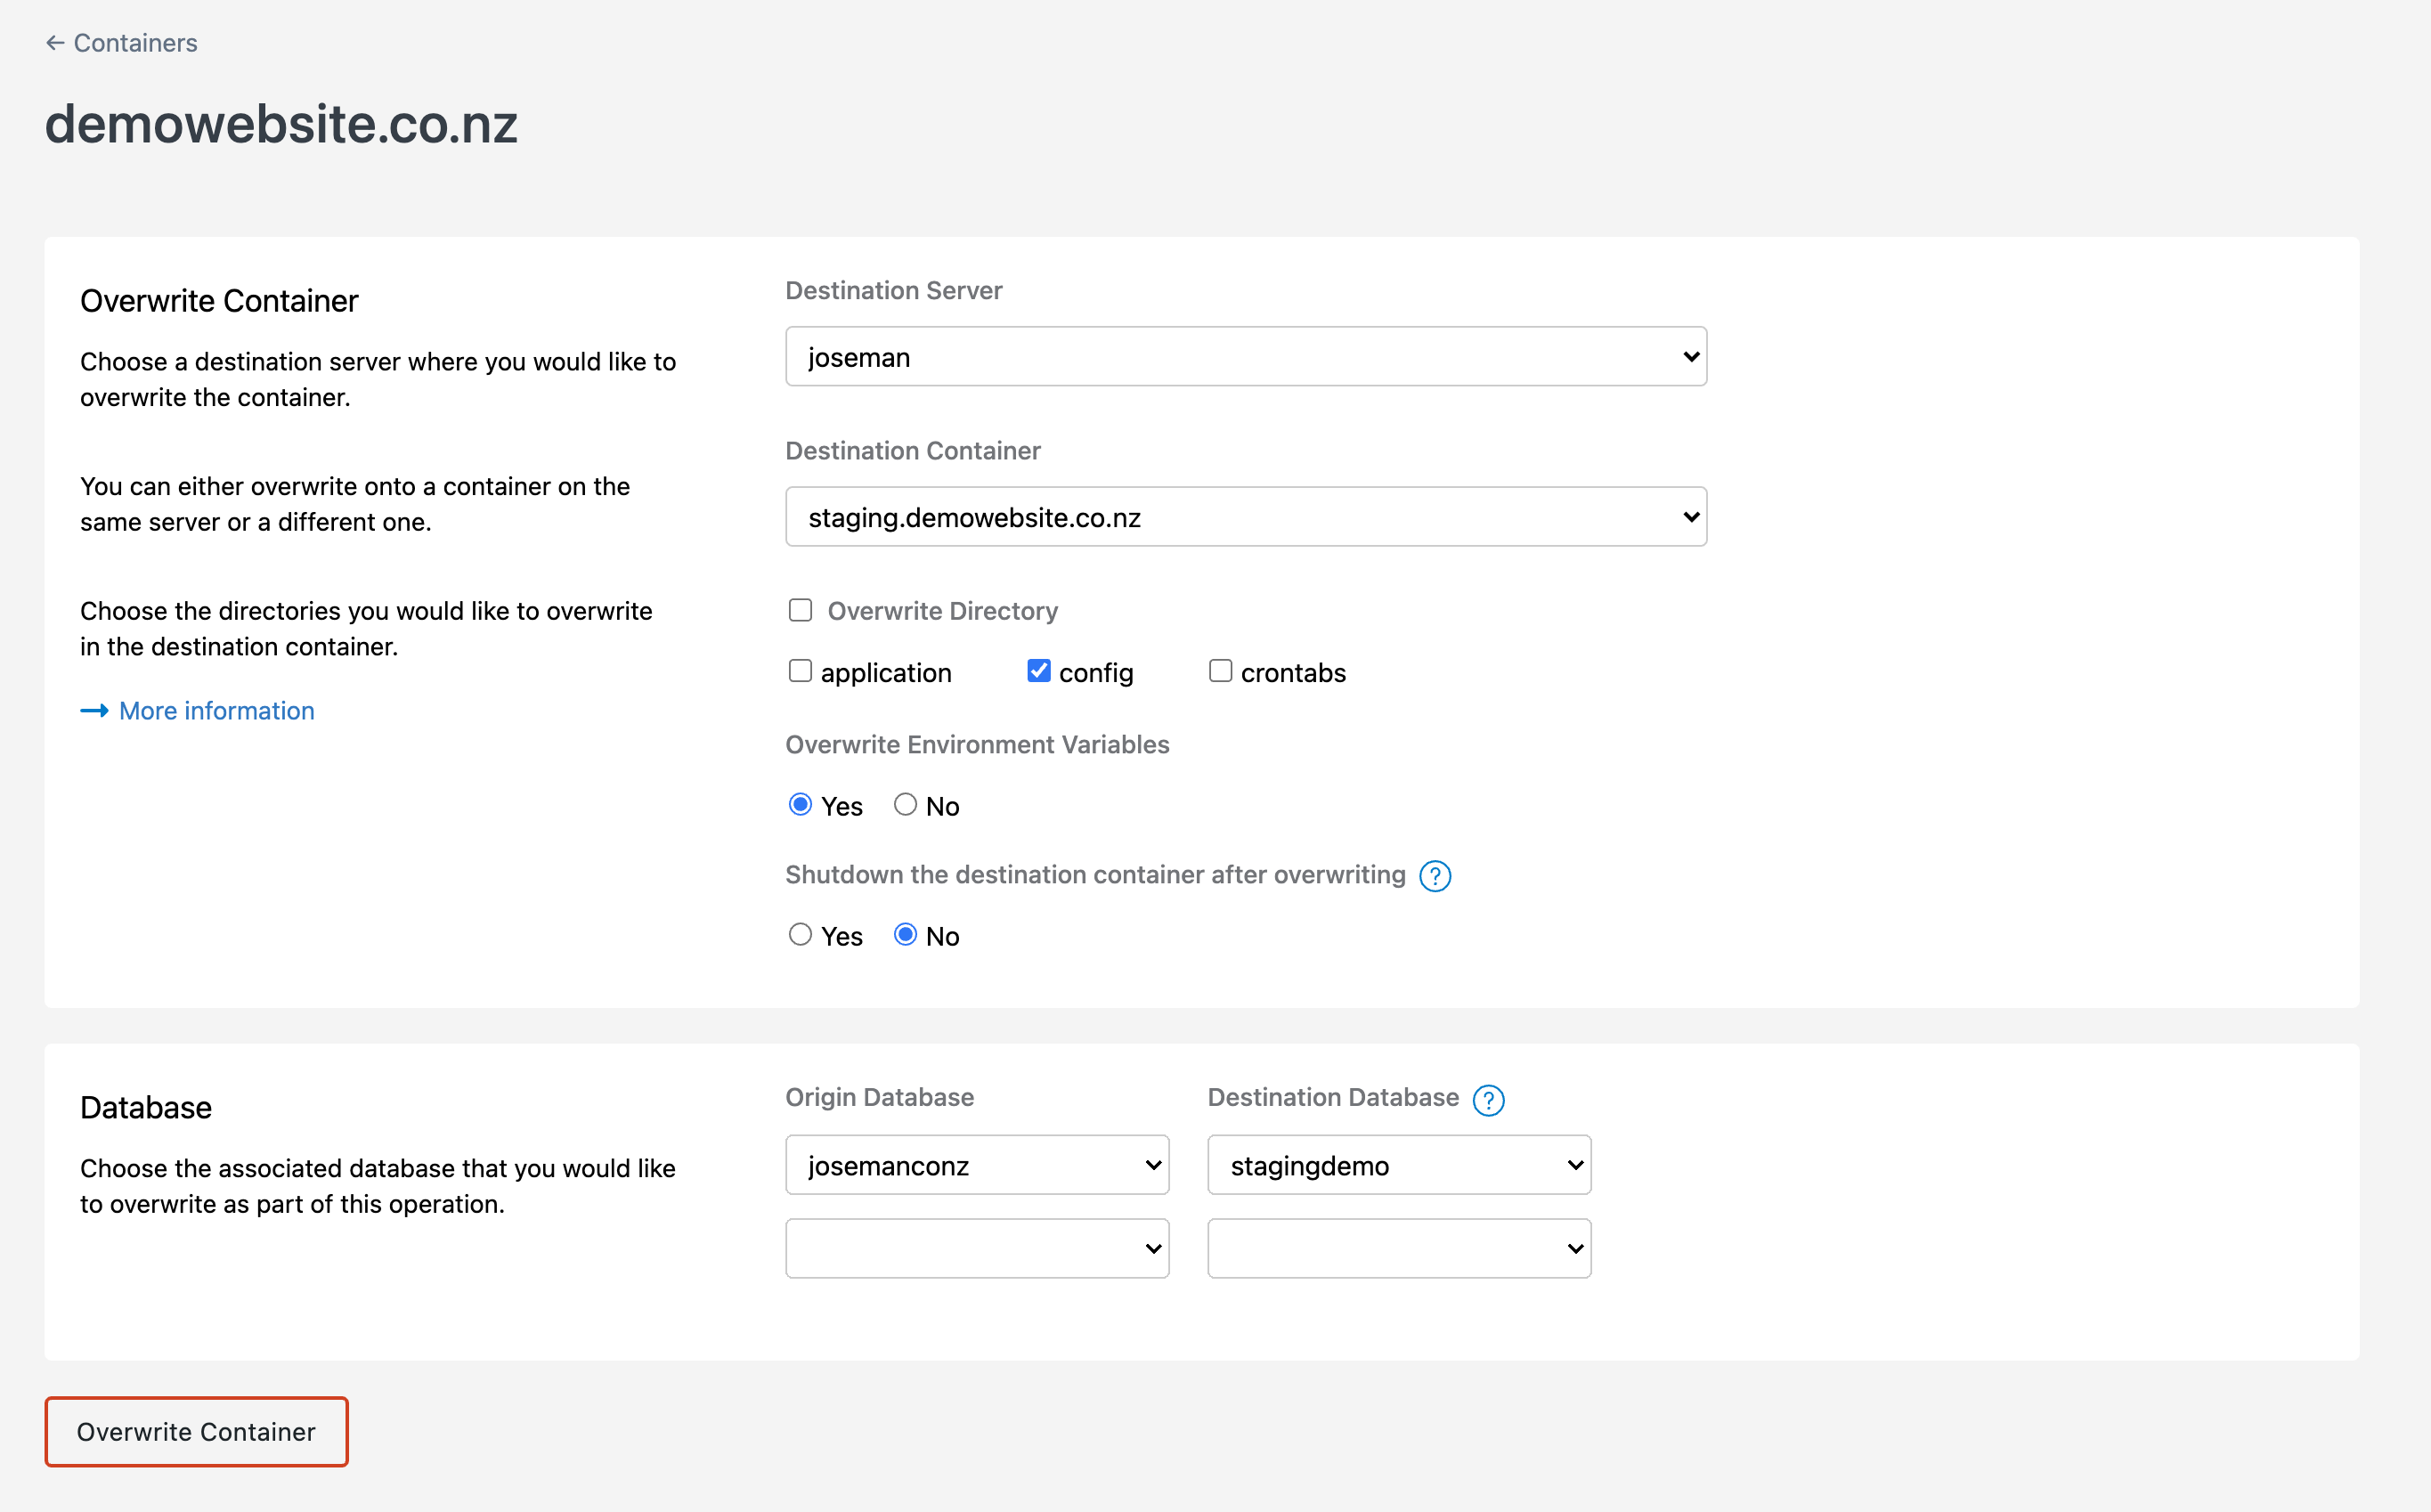
Overwriting an Existing Container
To begin overwriting an existing container, follow the steps below:
- When logged in to the SiteHost Control Panel, click the Containers module from the menu on the left.
- Click the Container Label you would like to clone.
- On the top right, click Clone.
- A pop up will show, click Overwrite existing container.
- Choose the destination server that the container to be overwritten is on.
- Choose the container to be overwritten from the dropdown.
- Choose the directories to overwrite.
Depending on the directories chosen, the destination container's matching folder will be overwritten.
- Specify whether or not you would like the container to be shutdown after overwriting.
- To overwrite a database: (Optional)
- Choose a database you would like to overwrite with.
- Choose a database to overwrite.
- Click Overwrite Container.