- Domains
- DNS Management
- Content Delivery Network
-
Cloud Containers
- Overview
-
Using Containers
- Creating and Managing
- Connecting to a Container
- Swapping the Image
- Domain Aliases
- Environment Variables
- Protected Environment Variables
- Backing Up
- Automatic Updates
- SSL Support
- Adjusting Execution Time Limits
- Upgrading Apache Image
- Renaming a Container
- Port Management
- Caching
- Cloning/Overwriting
- Restoring a Backup
- Production Mode
- Metrics Dashboard
- Accessing supervisord
- Container Deprecation
- SSH / SFTP Users
- Databases
- Volumes
- Custom Images
-
Technical Guides
- Create a NodeJS Container
- Creating a Service Container
- Working with .NET Core Web Containers
- Working with Node.js Web Containers
- Working with Umbraco Web Containers
- Deploying your application with git
- Python Container
- Enable Country-Level blocking in Cloud Containers
- Working with SQL Server Containers
- Working with the SilverStripe Caching folder
- Profiling a site using Xdebug on Cloud Containers
- Working with SilverStripe Containers
- NGINX Proxy for Service Containers
- Tuning PHP OPcache
- Deploying phpList on SiteHost Cloud Containers
- Deploying Mautic on SiteHost Cloud Containers
- Deploying n8n on SiteHost Cloud Containers
- Working with ModSecurity on Apache+PHP containers
- Low Disk Warnings & Upgrades
- Local Development
- Virtual Servers
- Dedicated Servers
- Private Cloud
- Cloud / Shared Hosting
- Email Hosting
- Monitoring & Bandwidth
- Account & Billing
- Developers
- SSL Certificates
- Networking
- AI Platform
Navigation
Options
Clear History
Developers
Cloud66 on SiteHost
Cloud66 on SiteHost
We all know that deploying a Ruby app can sometimes be a bit of a hassle. So instead of fighting with your shell why not enjoy a nice cold beer and hand it over to Cloud66?
Cloud66 is an application provisioning and management service. It allows you to easily build, deploy and manage Ruby apps on a SiteHost VPS. How does Cloud66 work? You just need to fire up a new VPS in the Control Panel, note the IP address and then login to the Cloud66 app.
Requirements
You will need:
- A Linux VPS running Ubuntu 14.04, 16.04, 18.04 or Debian 7.
- A Cloud66 account (Free).
- A Git repository.
Setup
Follow these steps...
- Create a Linux VPS in the SiteHost Control Panel. Note the IP address as we will need it later on.
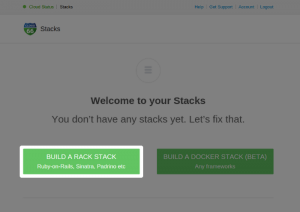
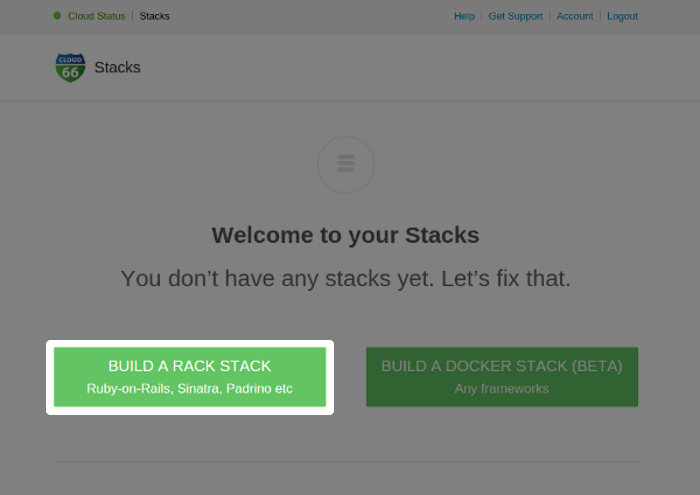
- Login to Cloud66 and create an account if necessary. Click on BUILD A RACK STACK and select "Ruby Stack" from the list.
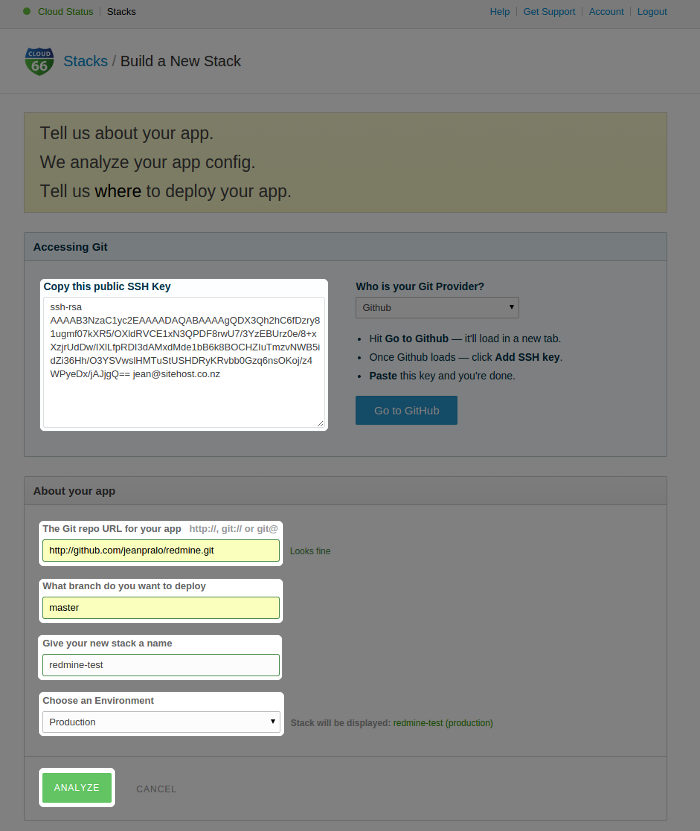
- Cloud66 is going to ask you for some information about your app. Fill in the different fields with your Git Repo URL, the branch you want to deploy, the name of the stack you want to be appearing in Cloud66 and the Environment it is going to run on. Just click Analyze and move to the next step. If your repo has no public access, Cloud66 provides you a SSH Key you can copy/paste to your repo access manager.

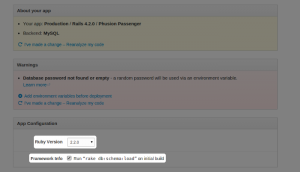
- After a minute or so depending on your app you can select a couple of options:
- Select your Ruby version
- If your application needs a database it may propose you to load the schema on the initial build
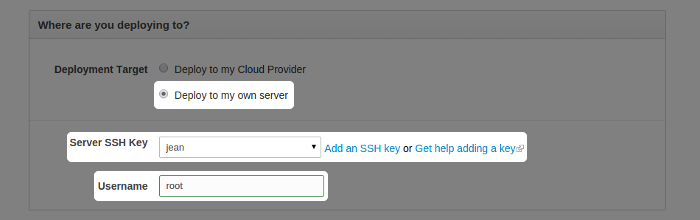
- In the section Where are you deploying to? choose Deploy to my own server
- Either select an existing SSH Key from the menu list or add a new one. Make sure the public key is added to the authorized_keys file for the user Cloud66 is going to connect with.
- Under username choose the user Cloud66 will be using to connect to the server (it can be root or any other user allowed to use sudo without a password)

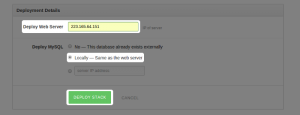
- Enter the IP address of the VPS you have just created in the Deploy Web Server field
- If deploying a SQL Database just choose Locally - Same as the web server
- Wait for Cloud66 to do its magic. The first deployment can take some time depending on the different dependencies you have.
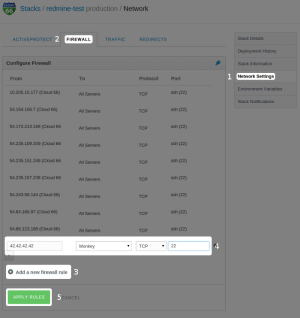
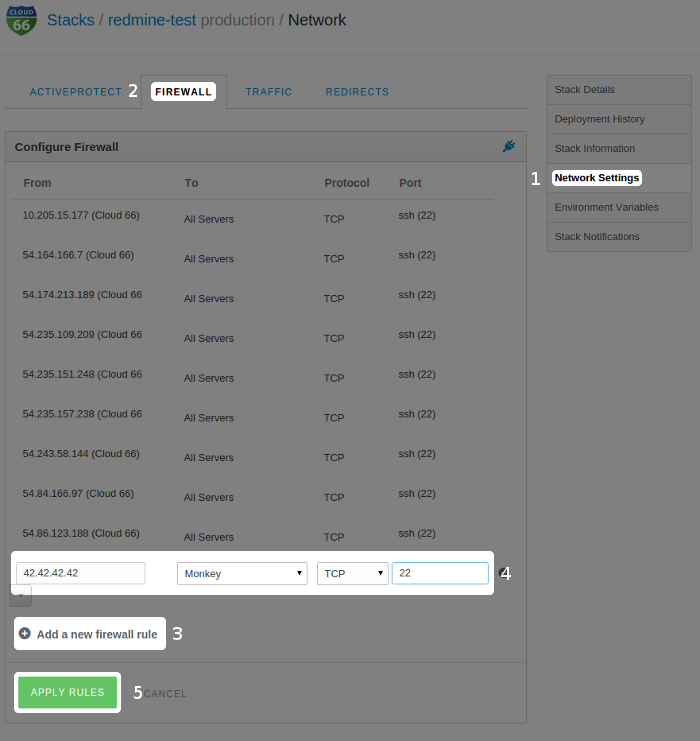
- Once the application is deployed go back to Cloud66 dashboard and click on the stack you have just deployed. On the right menu click on Network Settings and go to the Firewall tab. In order to protect your server Cloud66 automatically sets up a firewall, so make sure you add your IP addresses so you are still able to connect via SSH. To do so click on Add a firewall rule at the bottom, in the From field add your IP address, in the To field select the name of the webserver and not Rails Server. The protocol must be TCP and use port 22. Click Apply Rules and you are all set.
- Browse your website and it should work perfectly!


In case you have any trouble with Cloud66 you can find documentation here: http://help.cloud66.com.