Working with SQL Server Containers
You can deploy and run a SQL Server instance on Cloud Containers using the SQL Server Service image.
In this article, we will cover setting up a SQL Server Service Container, and how to access the database. The overall process is:
- Provision the SQL Server Service Container through the SiteHost Control Panel
- Connect to the Container created.
- Log into the database using the System Admin credentials setup during provision.
Provisioning
We have an article on Creating a Container available if you are not familiar with this step. The process is the same for any Service Container. Please specify an SSH Username and SSH Password or associate an existing SFTP user with the Container once it's created. Please note that the existing SFTP user should not be associated with any other containers.
You will need to provide a System Admin password as part of the provisioning process. Please refer to Microsoft's official documentation for more information.
You can choose the version of SQL Server you're running. If you wish to use a paid version of SQL Server, selecting "Product ID" and providing your Product ID in the relevant textbox will allow you to use said version.
Please be aware that the System Admin password can only be modified through the database. This is stored as an environment variable, but you cannot modify the password of a running SQL Server instance just through the environment variable!
Connecting to SQL Server
You can connect to SQL Server in two ways:
- Connect to it via the
sqlcmdutility tool. - Use a .NET Core + SDK Web Application to connect to it.
- Connect to it via an external application.
Connecting via the SQLCMD tool
When you SSH into the SQL Server container, you can use the sqlcmd tool located in /opt/mssql-tools18/bin/sqlcmd to access your SQL Server database.
The full command to use is:
/opt/mssql-tools18/bin/sqlcmd -S [container name] -U SA -P <YourMSSQLSAPassword> -CThe container name can be found on your Cloud Container details page.
This will allow you to modify your SQL Server database with Transact-SQL queries. For more information on Transact-SQL, please see Microsoft's official documentation.
Connecting via a Web Container
You can also connect to your SQL Server container via another container. We recommend using our .NET Core + SDK Web Application to do this. Please note that you will need to publish the relevant port if your Web Container is not on the same server.
In your web-application, you will need to use the internal container name as the host. This can be found on your SQL Server Container details page.
Connecting via an external application
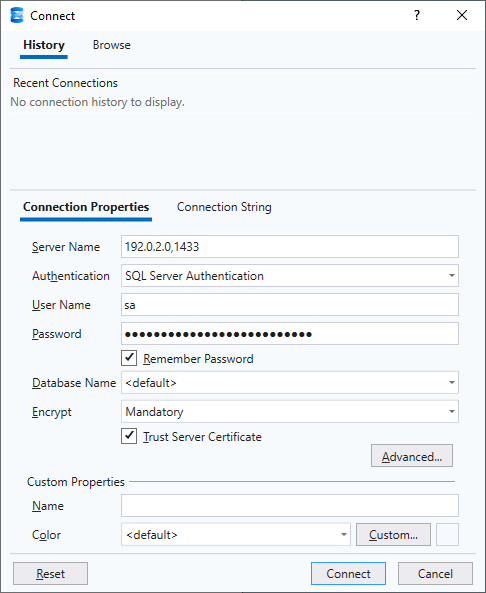
If you have published the 1433 port for SQL Server, you will be able to connect to the SQL Server instance via the SQL Server hostname and published port.
For instance, you can use SQL Server Management Studio (SSMS) to do this.
The connection details should look something like this, replacing 192.0.2.0 with your server's IP address:
Importing a database
To import an existing database from a .bak file, you'd need to first upload the file to /container/data/ using SFTP. You may want to add it to a subfolder (e.g. /container/data/backups/) to separate it from other SQL Server files.
This example is importing the database example from the file /container/data/backups/example.bak.
Importing with SQLCMD
To access SQLCMD, you need to be logged in via a single-container SSH user.
From the sqlcmd tool, you can import the database using Transact-SQL queries:
RESTORE DATABASE example FROM DISK = '/container/data/backups/example.bak'
GO
Importing with SSMS
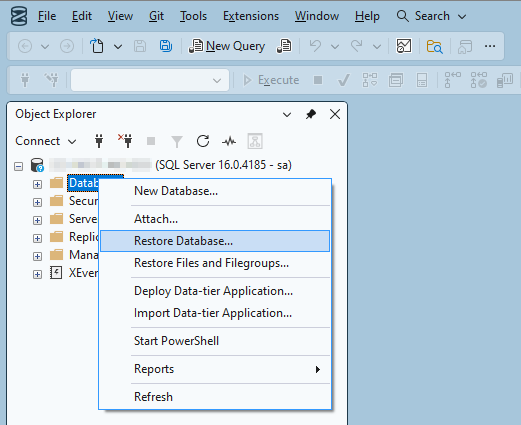
After connecting to SQL Server, you'll need to right click on the "Databases" menu and click "Restore Database..." from the "Object Explorer".
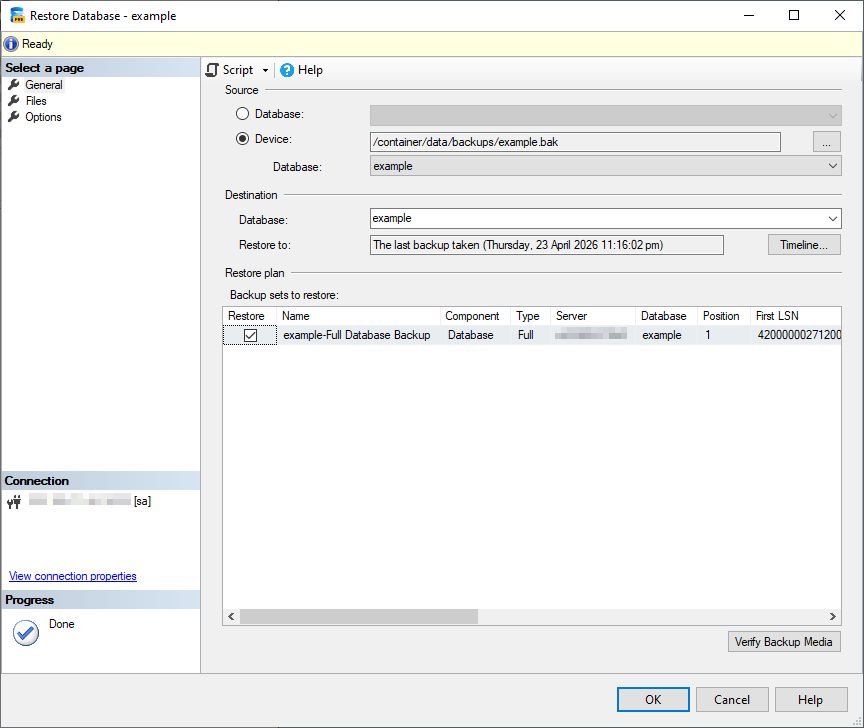
Select the .bak file as the "Device" under "Source" and click "OK".
Exporting a database
This example is exporting the database example to the .bak file /container/data/backups/example.bak. After exporting, the .bak file can be downloaded via SFTP.
Exporting with SQLCMD
To access SQLCMD, you need to be logged in via a single-container SSH user.
From the sqlcmd tool, you can import the database using Transact-SQL queries:
BACKUP DATABASE example TO DISK = '/container/data/backups/example.bak'
GO
Exporting with SSMS
After connecting to SQL Server, you'll need to right click on the database from the "Object Explorer" and click "Tasks" --> "Back Up...".
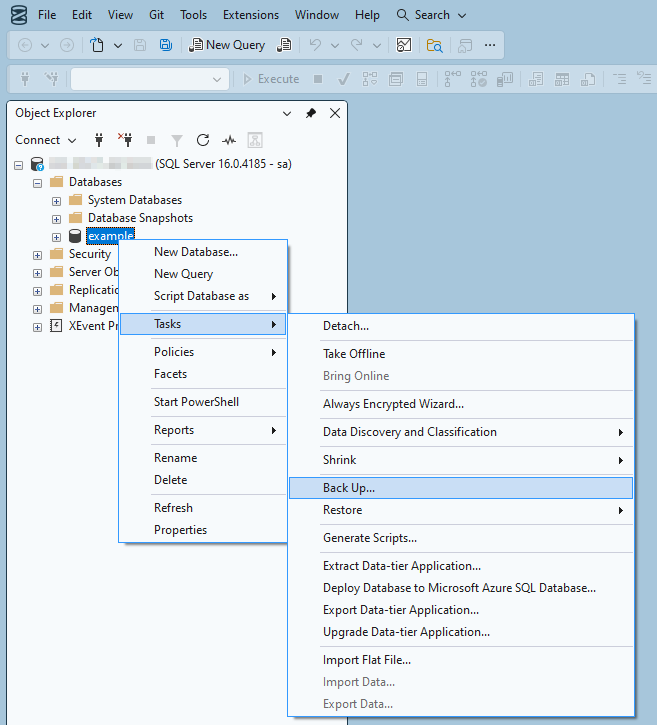
Select "Disk" as the backup destination, add the path where you want the database exported to, and click "OK".
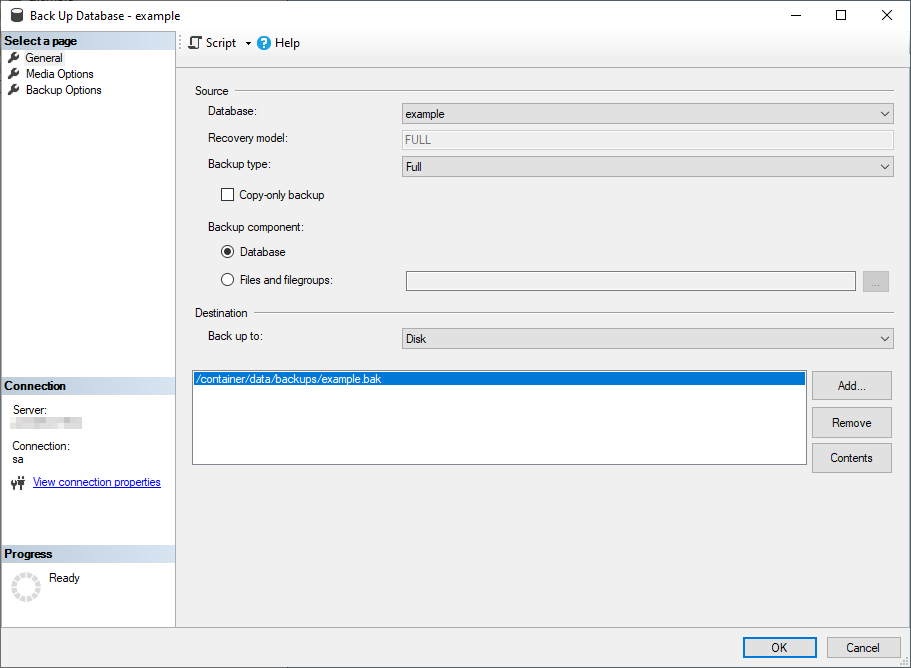
The exported database at /container/data/backups/example.bak can be downloaded using SFTP.
Backups
Backups are taken every night of your SQL Server container. They can be found in the same place as all of your other container backups: inside /container/backup/containers.
To restore the SQL Server backup, you will need to follow the restoration process as outlined here. Please note that if you need to restore the master database for SQL Server, you will need to get in touch with us.
As SQL Server requires a copy of the backup to exist on disk, you will need to copy the relevant backup files onto your container to initiate the backup.